
Victron BlueSolar PWM-Light, PWM-LCD&USB or PWM-Pro: which should I buy?
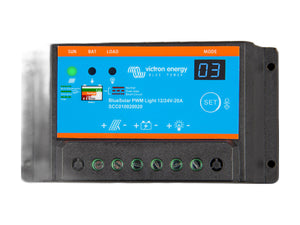
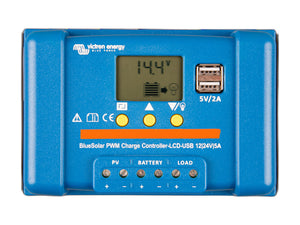
Short answer: PWM-Light is the basic one: fixed 14.2V/13.8V charging you cannot change, plus a load output with a low voltage cut-off. PWM-LCD&USB adds a readable LCD and a USB charging port, and is the line with 48V models. PWM-Pro is the one with configurable settings and an optional remote panel. All come in 5A to 30A.
If you have already decided PWM is right for your panel and battery, Victron offers three PWM families. They differ in what you can see and what you can change.
Side by side
| PWM-Light | PWM-LCD&USB | PWM-Pro | |
|---|---|---|---|
| Battery | 12/24V (48V in 30A) | 12/24V or 48V | 12/24V |
| Ratings | 5, 10, 20, 30A | 5, 10, 20, 30A; DUO 20A; 48V 10, 20, 30A | 5, 10, 20, 30A |
| Charging | 3-stage, not programmable | Not listed as configurable | Configurable settings |
| Display | Two-digit seven-segment | LCD | Display, plus optional remote panel |
| Extras | Load output with low-voltage cut-off and a lighting timer | USB output | Remote panel SCC900300000 sold as an option |
| Size (H x W x D, in) | 2.8 x 5.3 x 1.3 (12/24V) | 3.8 x 6.7 x 1.4 (5-20A), 4.0 x 7.3 x 1.9 (DUO, 30A, 48V) | 2.8 x 5.2 x 1.3 to 3.3 x 6.3 x 1.9 |
The decision rule
- You need to set charge voltages for your battery: PWM-Pro. The PWM-Light charges at a fixed 14.2V absorption and 13.8V float (28.4V and 27.6V at 24V) and cannot be changed. Check those numbers against your battery maker's charge spec before choosing the Light.
- You want to read battery voltage and charge a phone at the controller: PWM-LCD&USB.
- You want the controller to switch off a light or small load before the battery goes flat: PWM-Light. Its load output cuts at 11.2V (22.4V) and reconnects at 12.6V manually or 13.1V automatically, and it has one lighting timer.
- You run a 48V bank: PWM-LCD&USB (10, 20 or 30A) or the 48V 30A PWM-Light.
- You want to see the controller from inside the rig: PWM-Pro with the remote panel (4.0 x 8.0 x 2.0 in).
Picking the amp rating
Choose a rating that covers the output current of your panel array with some headroom. Mount the controller close to the battery with short cable runs, fuse the battery side, and connect the battery before the panel (disconnect in the reverse order).
What you need

Want the full walkthrough? Read the complete guide.
Have a different question? Tell us your rig and what you're trying to do.
Ask an expert